
Pica Pic
pica-pic.com
2011
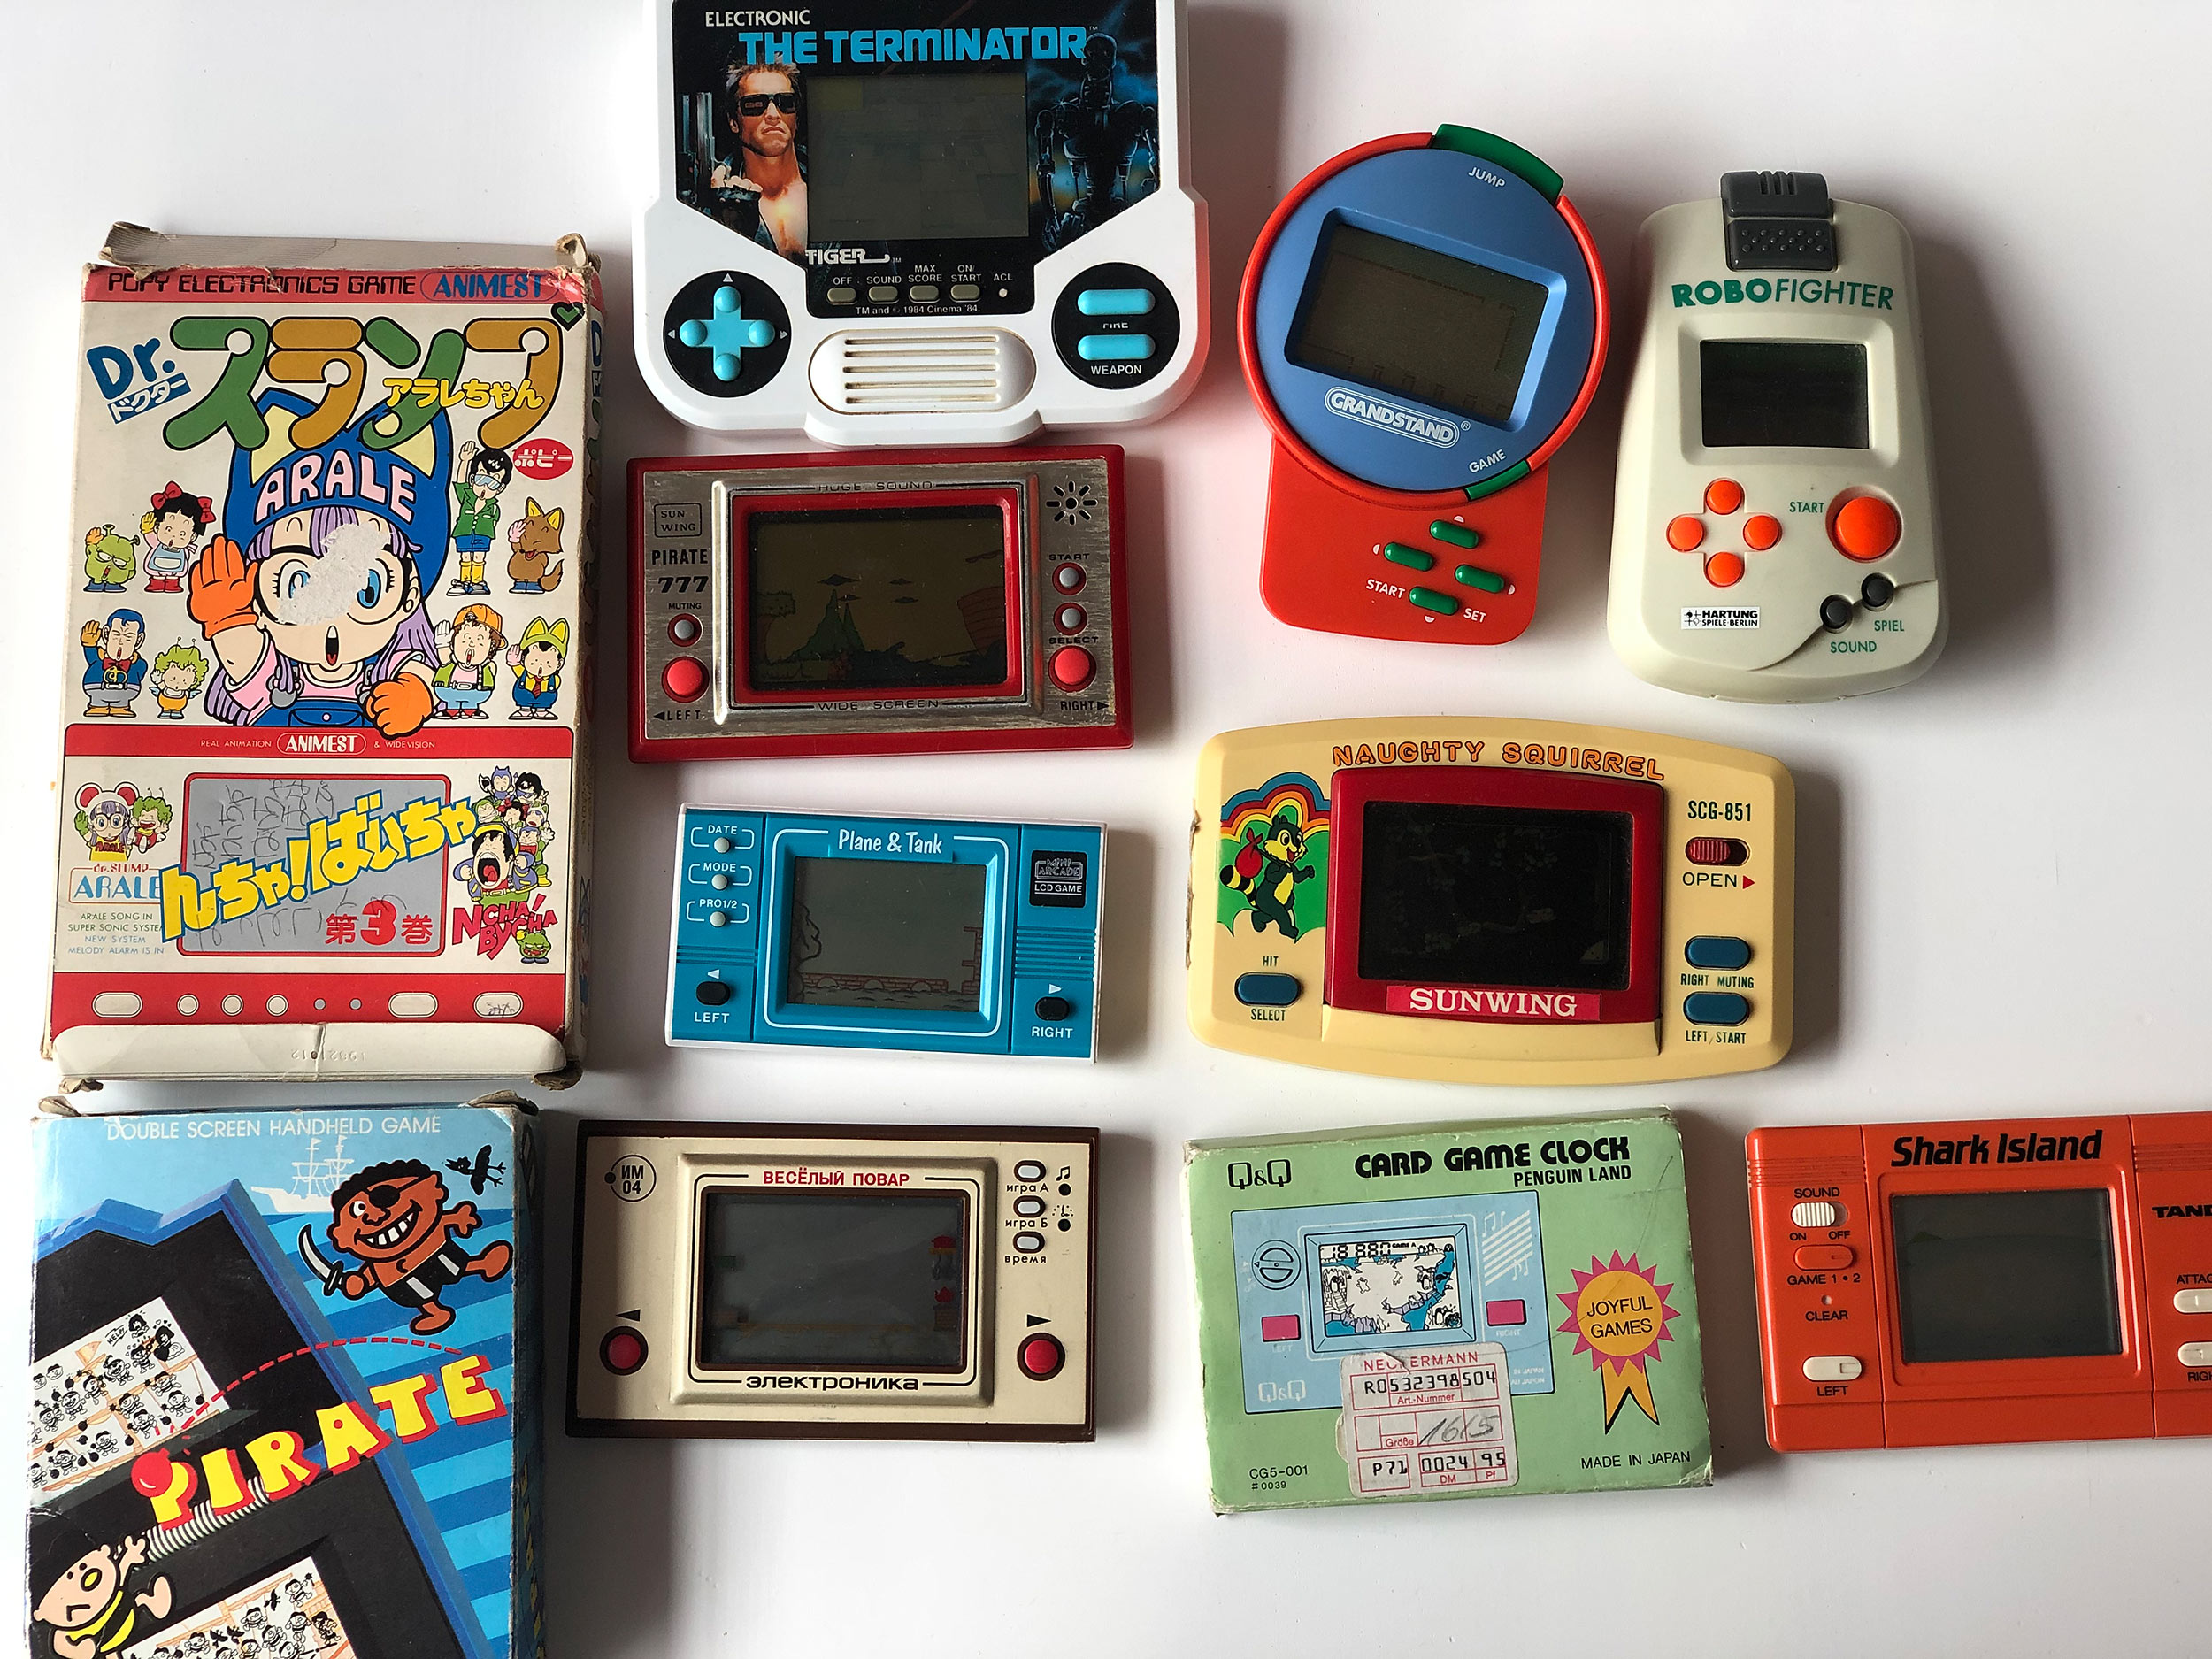
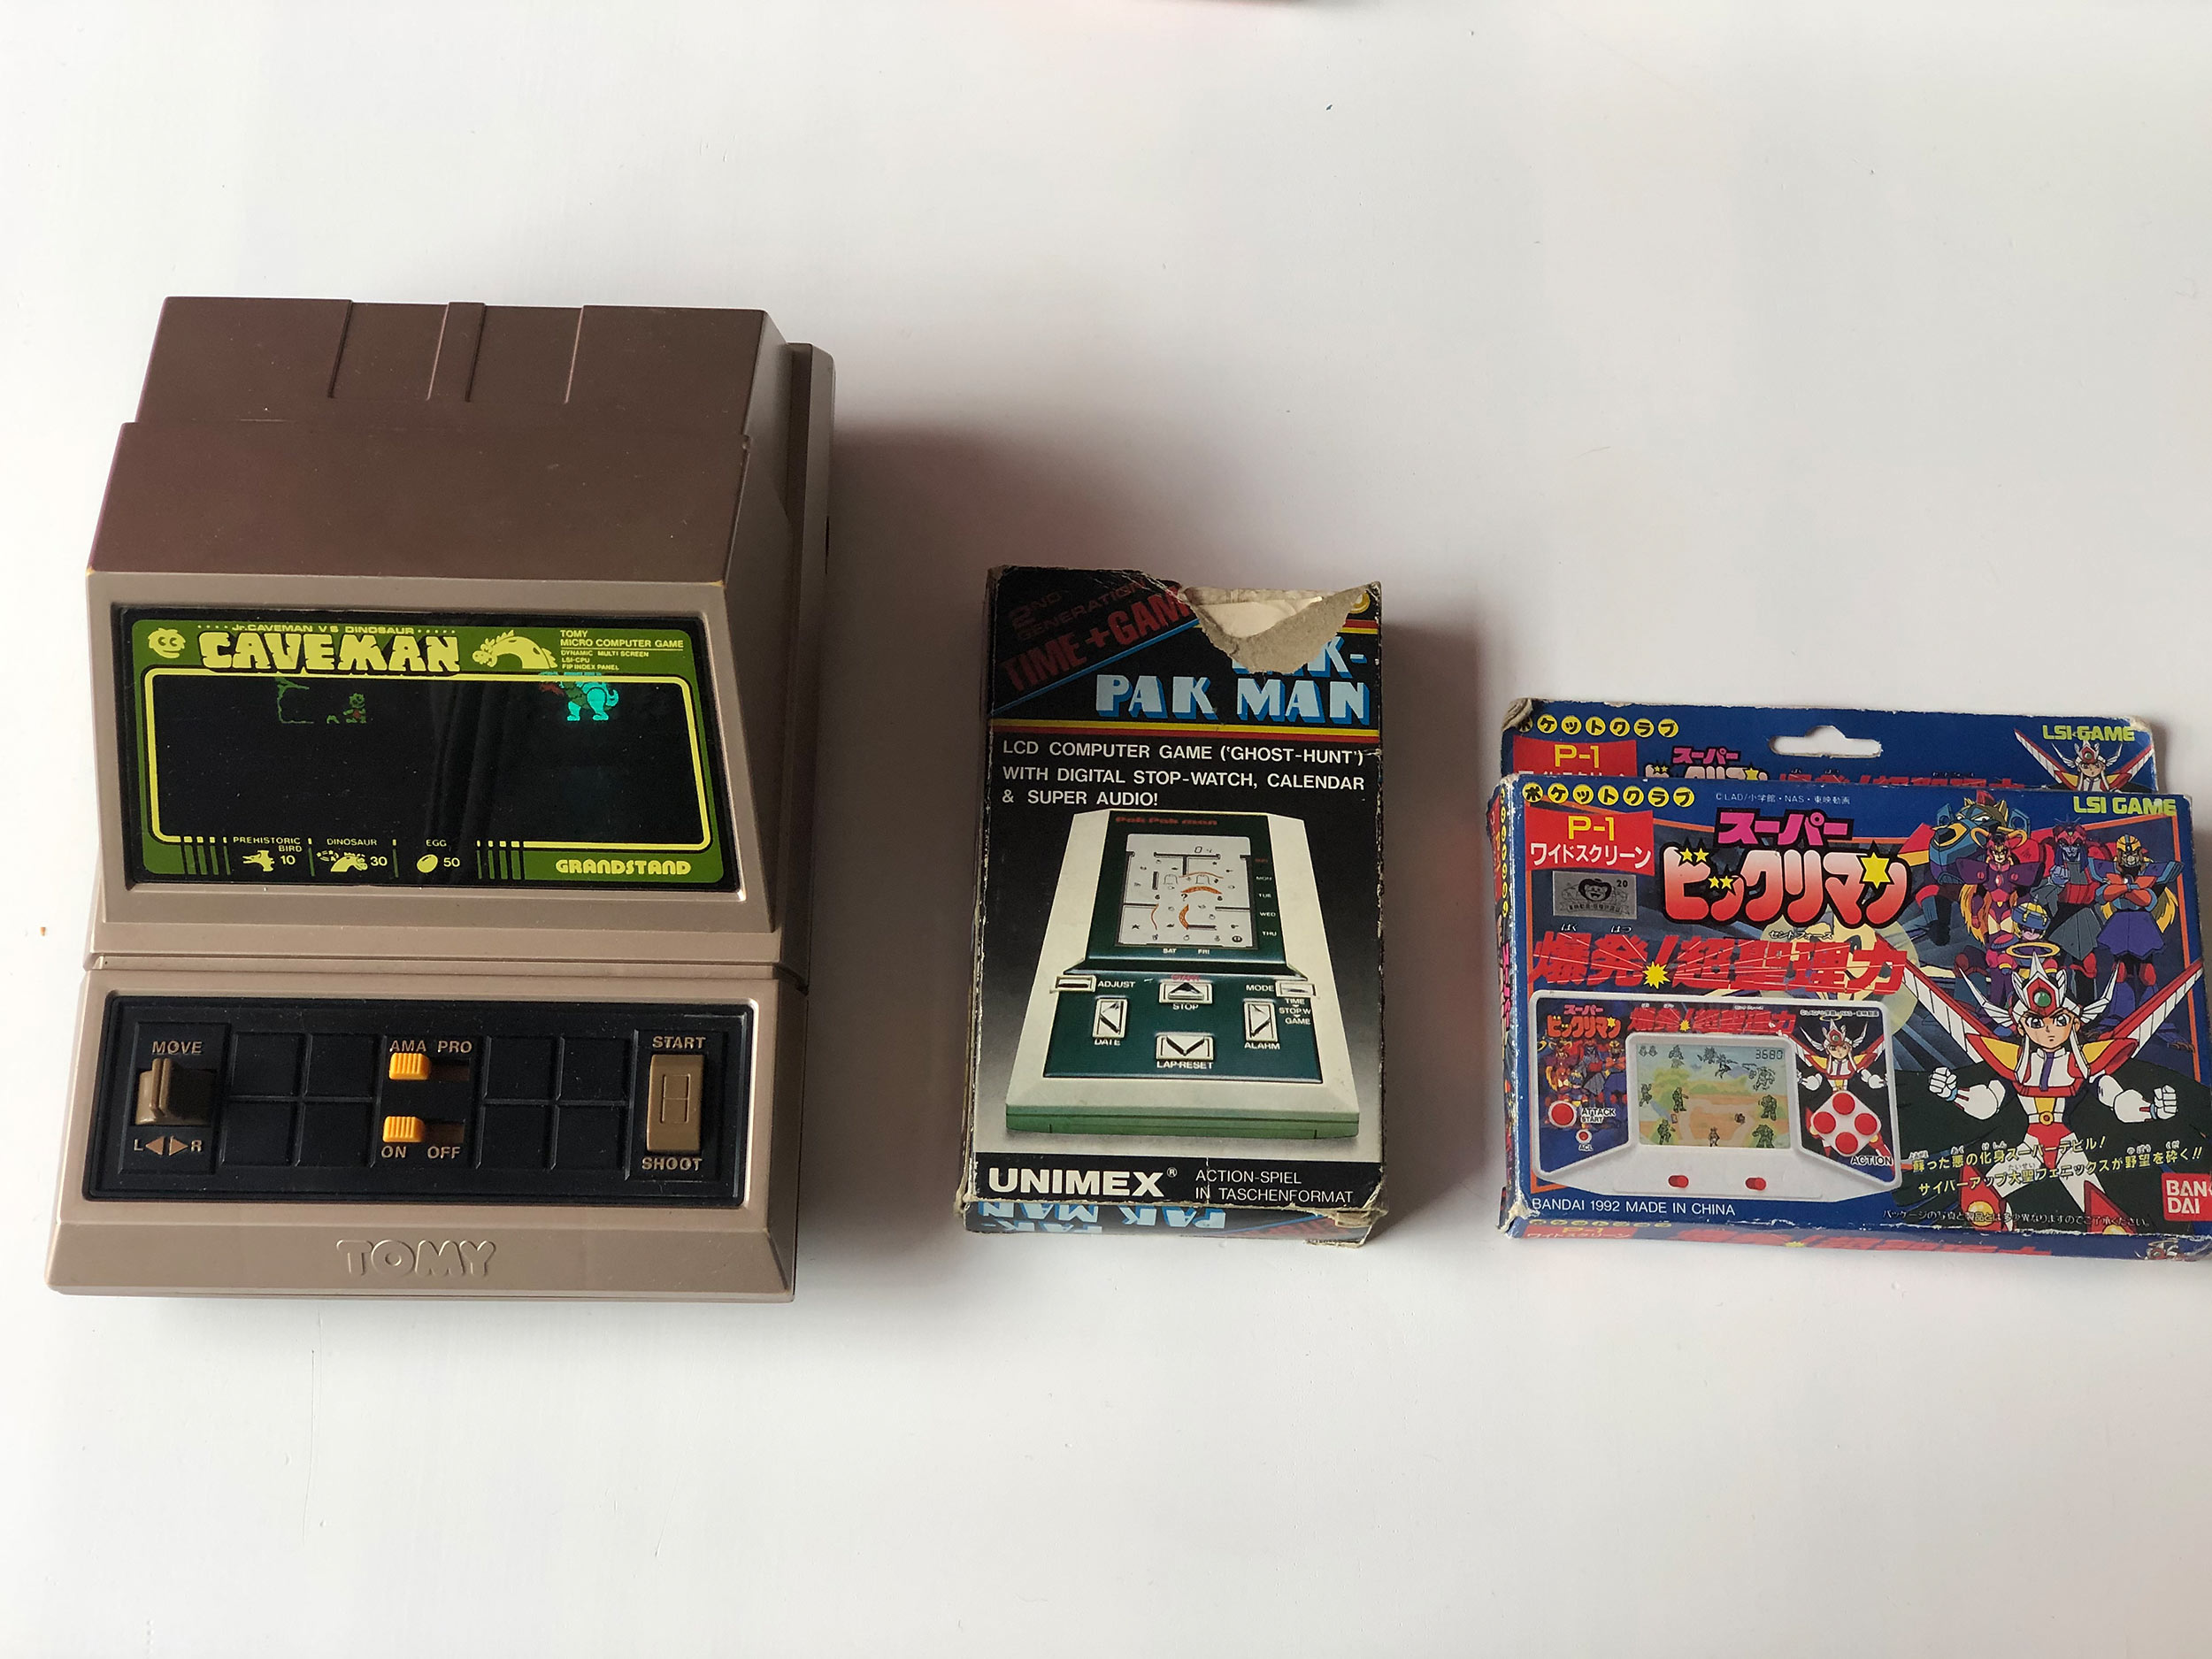
Pica Pic is a playable collection of 26 digitalized handheld electronic games. Most of them are LCD games from the ’80s. All of the consoles on the site are not reconstructed or rendered. They are existing objects being photographed and brought to life with a little bit of trickery and a lot of ActionScript coding.
To play, go to pica-pic.com. The site requires Adobe Flash Player, so you can also watch a let’s play video below.
After finishing Bubole and getting our first FWA we wanted to make more game-like Flash websites. We had a lot of ideas, but one really stood out. When we were kids our first portable games were Russian clones of Nintendo Game & Watch consoles. They were cheap and you could buy them from street vendors at open markets. Original Nintendo games were hard to get and we never had one (original Gameboy was our first Nintendo hardware). We thought it would be nice to retrieve our long lost consoles and maybe get all those that we wanted to have, but never were able to get.
We quickly discovered that it was not a cheap hobby, but getting a working copy was not that hard if you didn’t care about the box or general condition of the console. After buying few games on eBay and Polish Allegro we thought that maybe our next project could be a showcase of this type of LCD handheld games. Unfortunately, those kind of websites were already online and they had more resources then we could ever provide. But what if one could not only see photographs of the consoles, but also play the games?
We did a quick search for playable versions online but:
There were only very few of them available.
The ones you could play (even a few that were available on Nintendo’s website) featured rendered consoles. Not an actual photographs of physical objects that were played by kids 30 years ago.


Seeing all of those wonderful games one might wonder why it’s so hard to find a playable emulation online. Well, the answer is easy. Those are not pixel-based games. You can’t just rip out their data, put them in a ROM file and then use emulator to play the game. This is because you need a hardware – a LCD screen to be specific – that was designed for this particular game. The program stored in the game doesn’t have any information (design, location, colour, size) about the shapes displayed on the screen. It can only turn them on or off. Every shape you see is imprinted on the screen in one predetermined location.
The only way to simulate the game on a computer is to recreate and render the screen. The logic of the game probably could be then applied to the virtual screen, but we didn’t know how to do it, so our workflow for every game looked something like that:
1. Getting source material
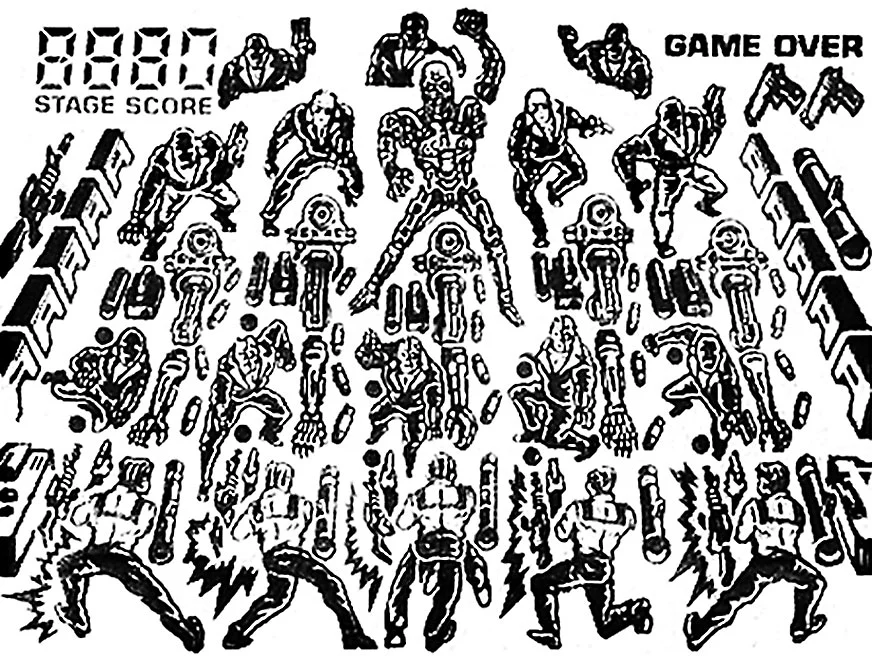
First we needed an actual console and it had to be a model were you could reveal all of the sprites on the LCD screen. Usually that would be by pressing the ACL button or by removing batteries and then putting them back again. In games without this feature it would be extremely hard to get a photo of all the sprites.
We did one shot of the console and at least two of the screen – one with all of the sprites and one without them (the screen on the general photo was usually too dark).


2. Extracting sprites
Now, using some Photoshop trickery, we separated sprites from the background, changed them to solid black shapes, and arranged them in a so-called sprite sheet – a layout were single image is placed on a separate rectangle. When you use code to cut it out of the image, you won’t end up with scraps of other sprites.
The shadow that a sprite casts on the background of the screen and a semi transparent look of the displayed shapes were added dynamically in the game.

3. Animating buttons
We wanted buttons on the console to be pushed when players would play the game on the site. Just one additional animation frame was needed (the pressed state) for each button to make it look natural. It was hard to make a photo of a pressed button so we again used Photoshop skills to do it.
4. Sounds
One of the most important part was recording sounds. Sounds gave us the correct rhythm and distance between actions. We also recorded buttons’ sounds of each console individually.
5. Playing
We didn’t know how to extract the logic from the console, so we just had to play it until we knew how the game works. Fortunately, usually it was very easy to see a pattern. Usually sounds were played in a very precise and round intervals (like 200 ms, 400 ms, 125 ms, etc.). All of the hidden bugs or special behaviours we could find online so most consoles on Pica Pic have those bugs coded in.
6. Coding and testing
Finally each game was coded in ActionScript 3. After making a few games we became quite proficient. We could add a new simple game every 3 to 5 days. All of the mechanics that were shared between games (pressing buttons, high-scores, zooming in, turning console on and off were coded into the framework, so we could just drop a new SWF file with the game, add name, description and a year of production into the database and the game was done.
Each game was then heavily tested. We were looking not only for bugs, but for any incompatibilities with the original. Only then the game was published on the website.
7. Reception
People loved Pica Pic. This is our most successful online project to this day. We received FWA for it and a lot of love from fans. For first few weeks we had over 100 000 unique users per day and we burned terabytes of transfer quickly. We had to negotiate with our hosting provider not to shut our shared server, because they thought it was a DDoS attack.